Preview image. Unlock full-res
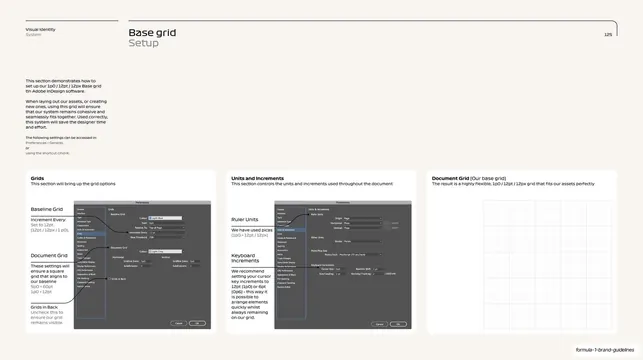
A base-grid setup page with three explainer cards showing InDesign Preferences screenshots and a resulting square grid.
Summary
A how-to page that walks through setting up the base grid in Adobe InDesign, using three white rounded cards: two showing annotated Preferences dialog screenshots and one showing the resulting grid.
Visual description
Warm off-white background, thin top rule with the "Visual Identity / System" kicker, "Base grid" title, outlined "Setup" subtitle and "125" at right. A short left copy column explains the workflow and references the Preferences shortcut. Across the lower two-thirds sit three white cards with soft rounded corners. The first two cards each pair a left list of labelled settings ("Baseline Grid", "Document Grid", "Ruler Units", "Keyboard Increments") with a dark grey InDesign Preferences dialog screenshot, thin connector lines pointing from labels to fields. The third card, titled "Document Grid (Our base grid)", shows the clean light square grid that results. Headings inside each card are bold; supporting lines are lighter.
Key takeaway
Documenting software setup as a row of cards, each pairing plain-language labels with a real annotated screenshot and a final "result" card, turns a tedious process into a followable recipe. Connector lines from label to UI field remove ambiguity.
Reuse notes
Useful for any brand or design-system deck that has to hand off a tool-specific setup (InDesign, Figma, CSS). The label-plus-screenshot card is reusable for onboarding or documentation. Screenshots date quickly with app updates, so keep them swappable.
From this deck: F1 base grid setup in InDesign
View deck